 There is absolutely not just a right way to convert a digital photo to black and white.
Everywhere you can found lists of plug-ins, methods or techniques applied to several graphic programs.
What's really matters is your personal approach to your photo, the result that you can already see into your mind and that you want to reach. You must remember that nothing works better than your taste.
Additionally you have to practice a lot. You don't have simply given up to your computer and let it decide how your photos have to look like.
Trying different technique, doing exercise, you will get the picture that you want.
With this basic point into our mind lets then to start and see different approaches to convert color images into black and white ones.
Two Easy Ways
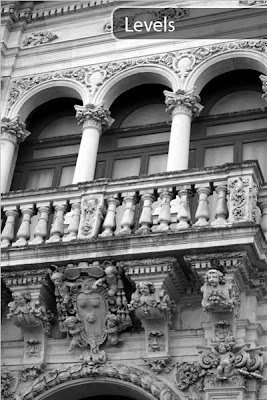
In Photoshop there are two very easy options to do the job. They are easy but perhaps not the best solution. I want to give you the tools but the choice about their use is up to you. We will see that those methods could be a good start that can be improved.This is the colored image that we want to turn in B&W. It is a beautiful Baroque balcony in Lecce (Italy).
Easy Way One: the Grayscale Mode
Go to Image>Mode>Grayscale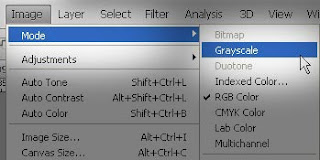
This is the result:

Easy Way Two: Desaturation Method
Go to Image>Adjustments>Hue/Saturation and bring the Saturation slide to 0.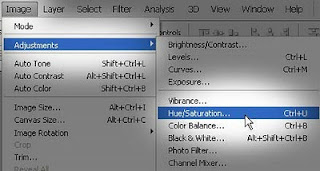
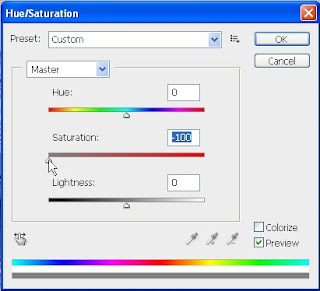
You get the same result looking for Hue/Saturation going to the adjustment palette.
This is the result:
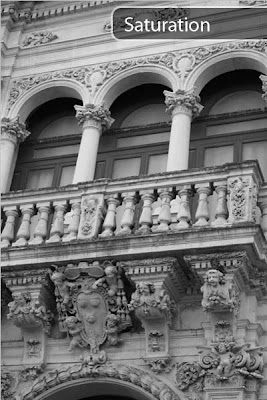
Both methods are simple and direct but the converted image looks dull and flatten.
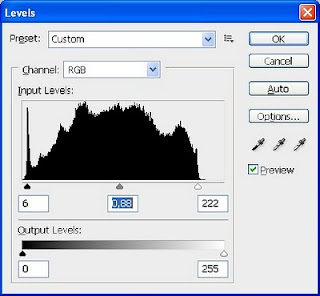
You can improve this result playing with the levels (Image>Adjustments>Levels) and giving more personality to the shot.
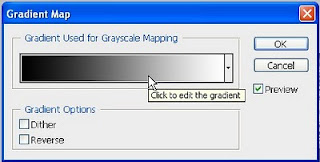
Another good way to enhance the result is to apply a B&W Gradient Map (Image>Adjustments>Gradient Map).

The Gradient Map Window appears.
Click the gradient preview to edit the gradient and the Gradient Editor Window appears.
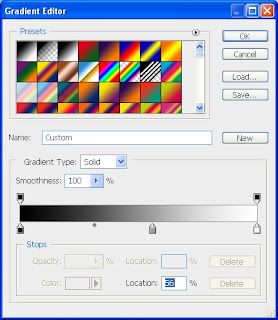
Change the location relation between the black point and the white point moving the little circle between the two colors. you can also add a new gradient color in the middle. Here I've added a gray color.
This is the final result.

The final photo looks much better with few simple actions.
Please don't miss the post: How to Convert a Color Photo into a Black and White Ones - Part II: Challenging Ways.
I'll post it next week.
For the time being compare the photos that we get today and choose your favorite method! ^_^


